A small pastry with plenty of guava flavor
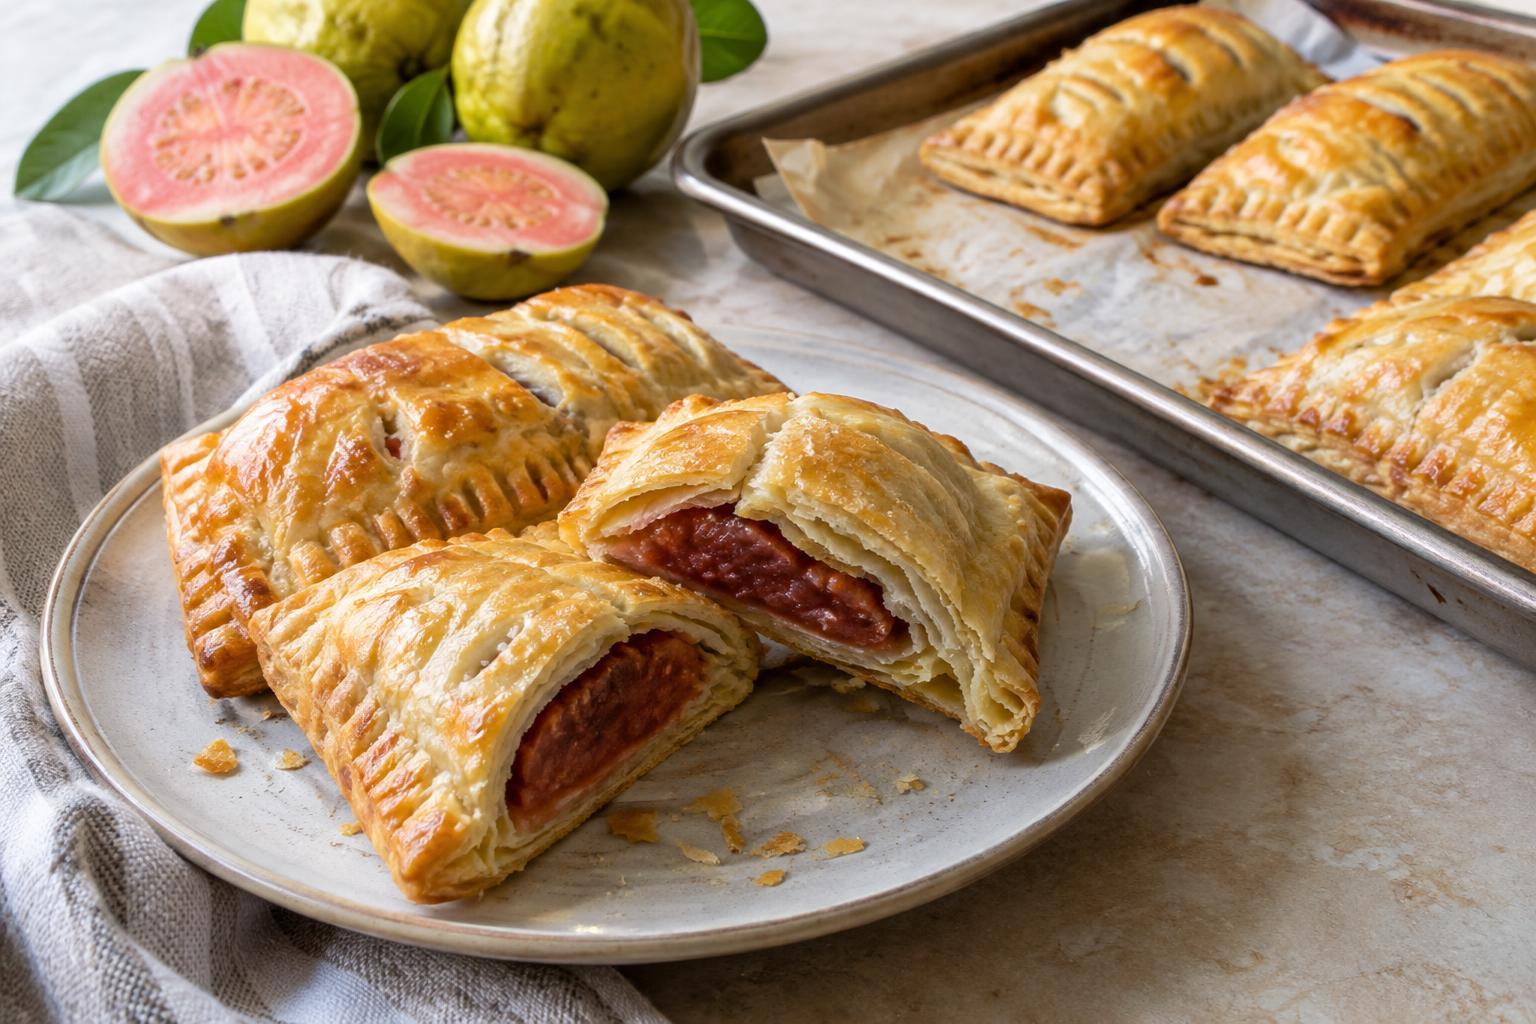
Guava’s sweet-tart flavor feels at home in a hand pie: a little filling goes a long way, and the pastry makes it easy to carry one to the table or pack one for later. For this version, the shortcut is a sheet of frozen puff pastry. It gives the pies delicate, crisp layers without mixing or rolling dough from scratch.
Guava paste is the easiest filling to use because it is thick enough to stay mostly inside the pastry as it bakes. Look for a firm, sliceable paste rather than guava nectar or a pourable sauce. Fresh guava is lovely, but its moisture varies; putting chopped fresh fruit straight into these small pies may leave the pastry soggy or cause leaks. Save fresh guava for serving alongside the finished pies.
Gather the ingredients and prepare the pastry
To make nine small hand pies, use one sheet of frozen puff pastry, about 2 ounces of guava paste, one egg and a teaspoon of water. Keep a little flour nearby for the work surface. If you like a sparkling top, have a teaspoon or two of coarse or granulated sugar ready. A small pinch of salt in the egg wash is optional.
Thaw the puff pastry according to its package directions, until it unfolds without cracking but still feels cool. Heat the oven to 400°F and line a baking sheet with parchment. Cut the guava paste into nine small pieces, roughly a teaspoon each. Beat the egg with the water in a small bowl. Flour the work surface lightly, then unfold the pastry. If it feels sticky or very soft, return it to the refrigerator for a few minutes before cutting.
Fill, fold and seal the pies
Cut the pastry into a three-by-three grid to make nine squares. Place one piece of guava paste near the center of each square, leaving a clear border on every side. Resist adding extra filling: a heaped center makes the pies harder to seal and more likely to spill in the oven.
Brush a little egg wash along two adjoining edges of each square. Fold each square diagonally over its filling to form a triangle, pressing the edges together gently. Use the tines of a fork to crimp the sealed edges, taking care not to press through the center. Transfer the pies to the prepared sheet with space between them. Cut a small slit in the top of each one so steam can escape.
Chill the shaped pies for 10 to 15 minutes while the oven finishes heating. Then brush the tops lightly with egg wash, avoiding puddles along the cut edges, and sprinkle with sugar if using. Keeping the pastry cool helps it hold its shape; the egg wash gives the tops an inviting golden finish.
Bake until crisp, then let the filling settle
Bake the hand pies for about 18 to 24 minutes, until they are well puffed and deeply golden on top and around the edges. Ovens and pastry sheets differ, so use their color and texture as your guide rather than relying only on the clock. If a little guava escapes, let it cool on the parchment before lifting the pie away.
Leave the pies on the baking sheet for at least 10 minutes before serving. The guava filling will be very hot just out of the oven, and a short rest helps it set. These are especially good slightly warm, when the shell is still crisp. Once completely cool, keep leftovers in a covered container in the refrigerator and reheat briefly in an oven or toaster oven to refresh the pastry.
Easy variations and serving ideas
For a guava-and-cheese version, add about half a teaspoon of softened cream cheese beside each portion of paste before folding. Keep both fillings modest so the edges can close securely. You can also skip the sugar topping for a less-sweet pastry, or add a little finely grated lime zest to the filling for a brighter aroma.
Serve the hand pies as they are, with coffee or tea, or set out slices of fresh fruit alongside them. If you find ripe guava at a market, it makes a fitting companion without changing the dependable paste filling. The method is simple enough to repeat, and once you know how much filling your pastry will hold, you can make each batch a little more your own.